How to setup and use electronic funds transfer (EFT) in ACH format to pay vendors in Business Central (excerpts from Microsoft documentation, notes added by Kim Dallefeld)
The cost of paying vendors by paper check is estimated at between $3.00 and $10.00 per payment, with receiving payment by check at $1.57 to $5.00. Conversely, the cost of ACH is estimated at only $.26 to $.60 per transaction. Paying by paper check is also more prone to errors, can stress vendor relationships due to late payments and affects clear visibility to cash flow.
Making the change to ACH is simpler than ever in Business Central. Why you ask?
- Testing and making changes to the ACH file format is now available to users, no developer required.
- One ACH file can now be generated for an entire day’s worth of posted payment runs. File However, if you still want to generate files for each payment run, this is still an option.
- File content can be reviewed prior to generation.
- Remittance advices can be easily resent to vendors.
- Setup is not complicated.
Let’s get started!
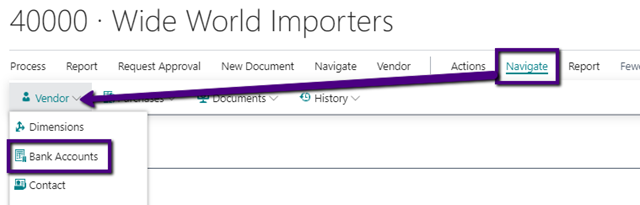
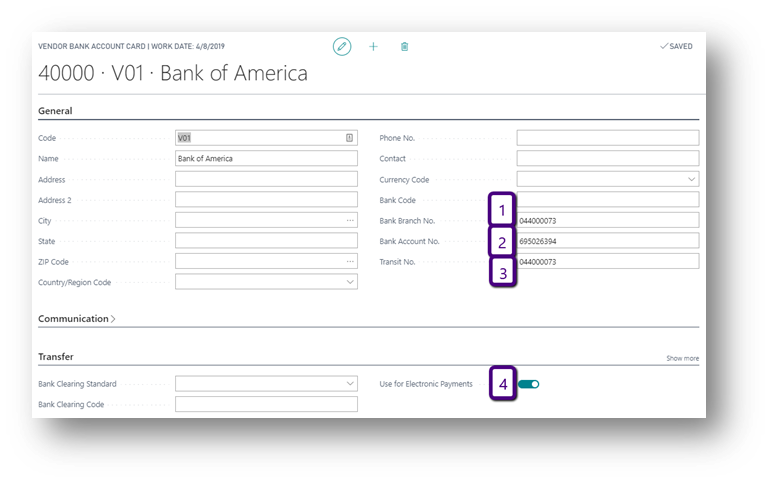
- Vendor Card – Navigate to Bank Accounts and complete the ACH required fields.
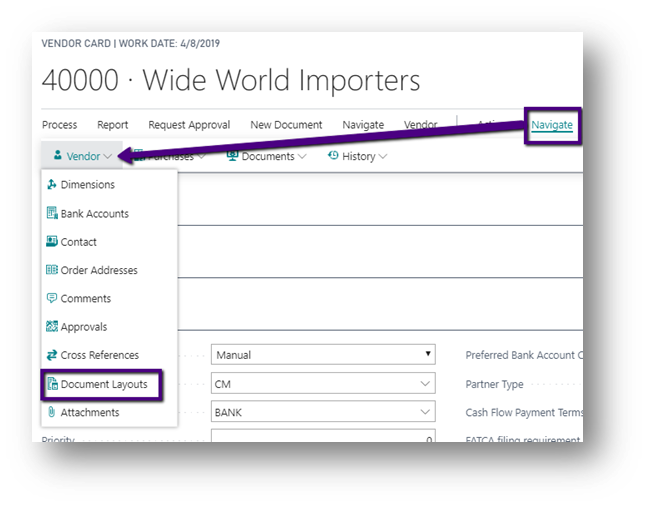
- Vendor Documents Layout – Navigate to select reports to send as remittance advice and who to email it to. Make certain to define the report that will be sent from unposted as well as posted payment entries.
Note: Report ID in the US is 11383 for the unposted payment entries unless you have a custom report. Also remember to set the desired email to receive the remittance if different from the vendor master record.
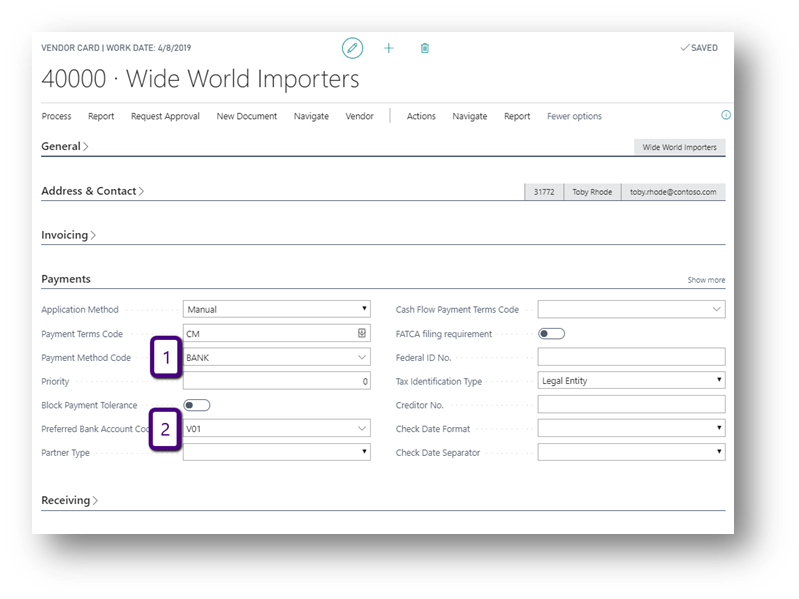
- Vendor Card – Select a Payment Method that indicates to you this vendor is to be paid by EFT (ACH) – though not required this is really helpful during Suggest Vendor payments. Select the bank account setup for ACH as the Preferred Bank Account Code.
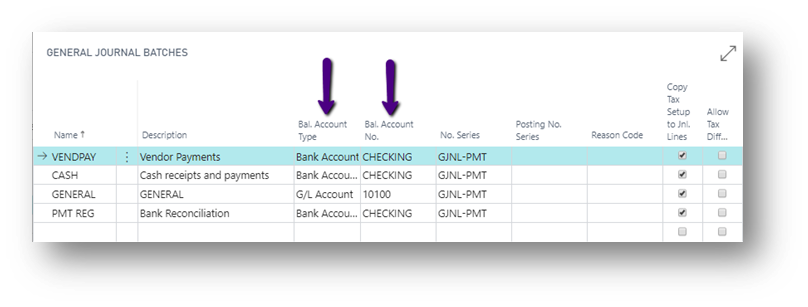
- Journal Batch – Create a batch making certain to set the bank for balancing account information. And the Allow Export column is checked.
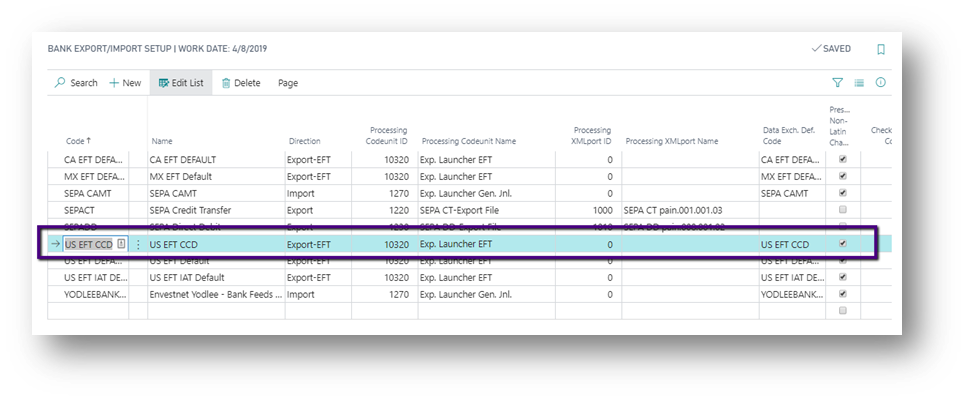
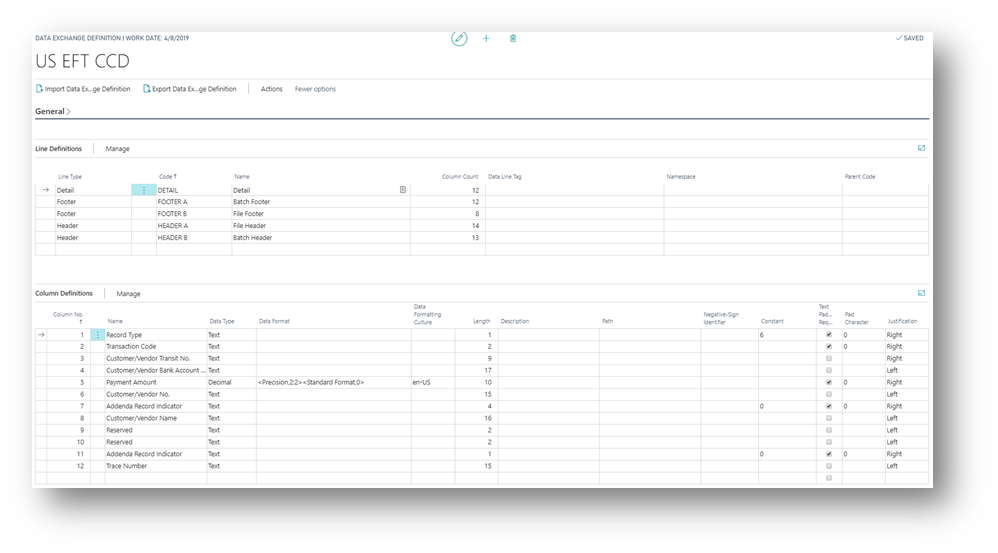
- Data Exchange Definitions –
Note: starting with the US EFT Default works for most larger banks. Smaller local banks tend to have minor changes to the format.
The screen shots herein use the US EFT CCD definition but the setups are the same.

- Bank Export/Import Setup – Confirm the desired Data Exchange Definitions is select in the Bank Export/Import record.
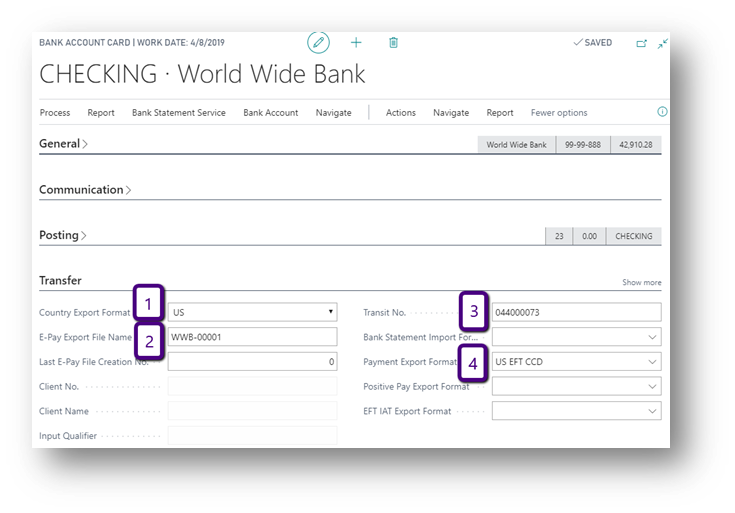
- Bank Account – add the information to the operating account you will use to transact ACH.
County Export Format, Pay Export FileName, Transit No and Select Bank Export/Import desired as the Payment Export Format. Also, on Posting tab, the Last Remittance Advice no. and you will need the actual bank account number on the General tab.
- Company Information will need your company’s federal identification number. Some banks want your company name in All CAPS so you may have to make that change in company information as well.
After all the setup is complete, your AP department is ready to start testing. (***I strongly recommend you test major procedural changes such as these, even if only setup & configuration related, in a sandbox (test) environment prior to implementing in production.)
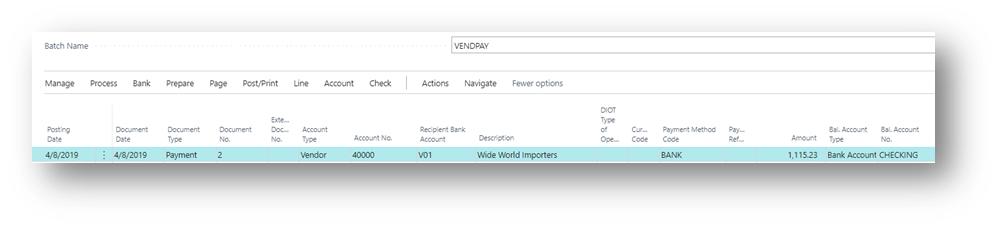
- Use Pay Vendor or Suggest Vendor Payments to build a payment journal indicating to send payment electronically (ACH.) Make certain you select the payment journal batch you defined earlier with the bank account as balancing account.
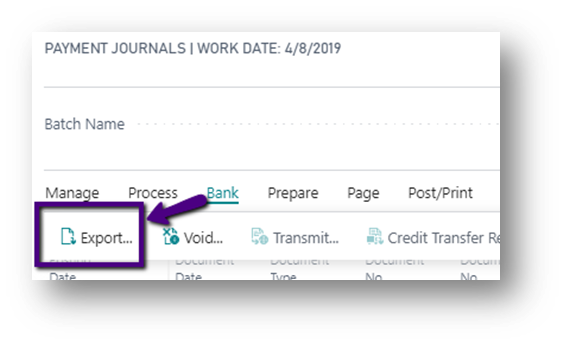
- Once the payment journal (batch) has been created, to send email remittance advices automatically from the payment journal….Go to Bank, Export. (PDF example shown.)
- In this example, we are waiting until the end of payment processing to include all electronic payments for the day into one export file therefore we will post the payment journal.
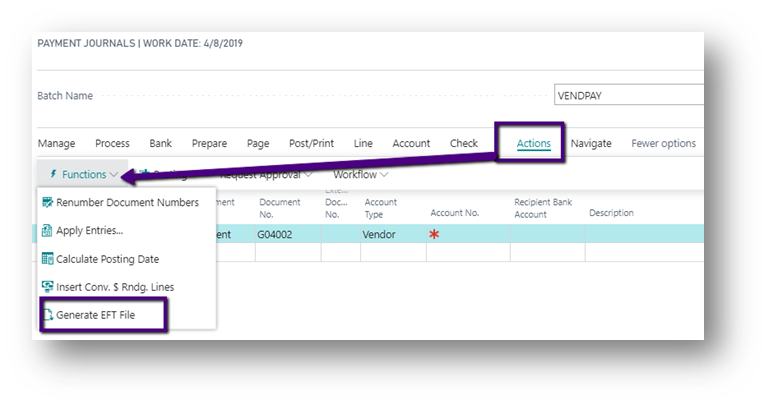
- You can also select to Generate EFT file prior to posting Payment Journal Lines. In my experience this approach can cause issues if upon trying to post the payment journal you have errors that require changes after the EFT file has been generated. In testing, determine the best approach for your organization.
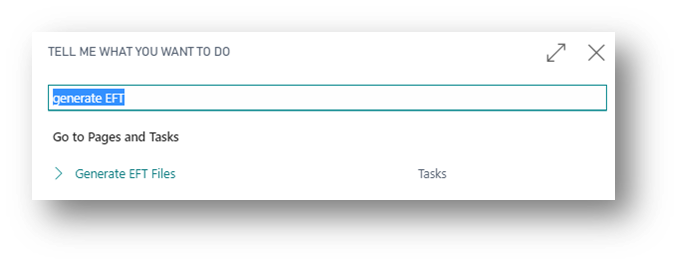
- When ready to create the ACH file, run the Generate EFT File from Actions. This can be done from the payment journal (now empty,) or found using Tell me.
- Select posted electronic payment lines to include in the ACH file. Only lines not previously sent in an EFT file are available for selection. Generate the EFT file.

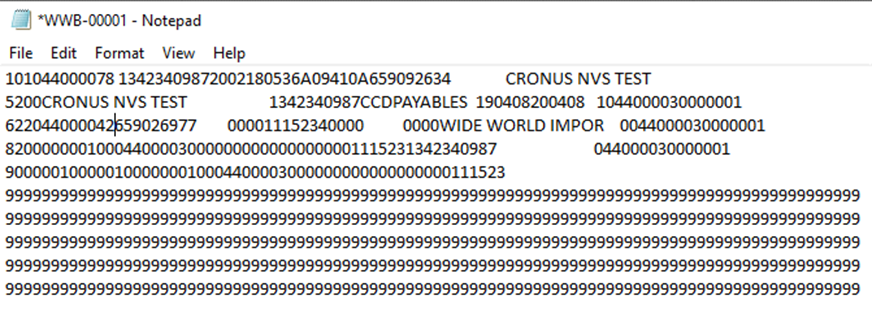
- When testing, check the export file created to the bank’s documentation. (I have found that some banks are happy to send you a sample export file however this is not provided as a matter of course. This makes it easier to verify your results are in the proper format and with correct values.) If changes are required, modifications can be made to the Data Exchange Definition.
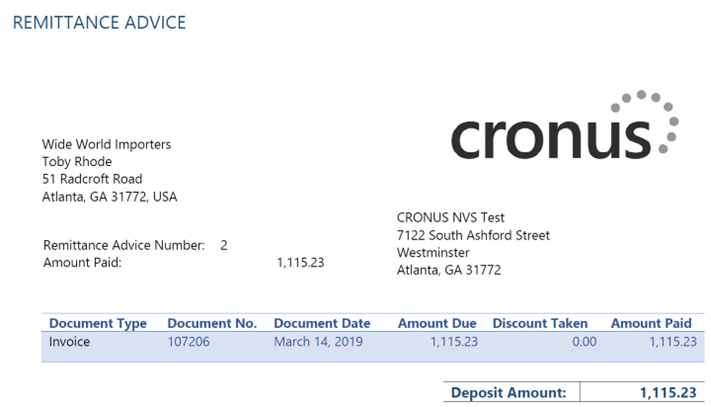
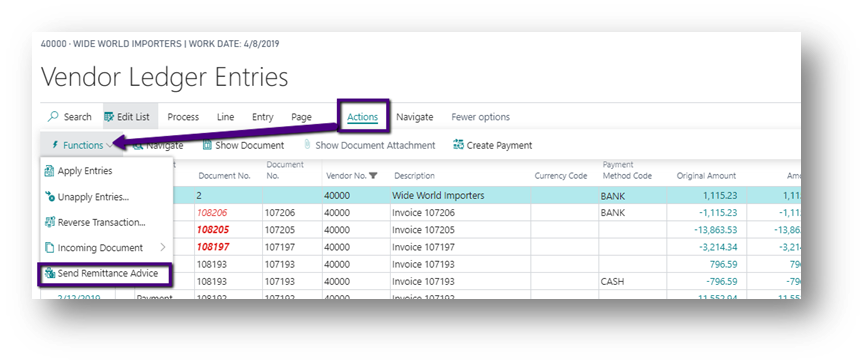
- If needed, a remittance advice can be printed or resent at any time from the payment Vendor Ledger Entry.
I hope this answers your questions and provides you with the confidence to begin testing the use of ACH to replace your printed checks with Business Central. Until next time…