

Author: Kim Dallefeld
Contributor: Steve Chinsky
Do you have or manage multiple companies?
Do you buy and sell between each company?
Do you have one company that pays most or all, of your vendors for each company?
If you answered yes to any one of the above questions, you need to use Business Central Intercompany features.
Overview
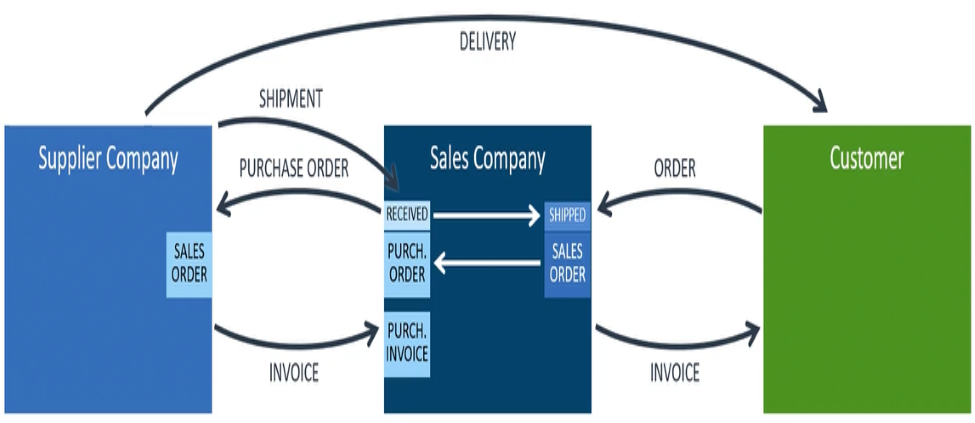
The recording of transactions like sales, purchases, and journals without using intercompany, means you are working way too hard because you are posting each transaction twice. Once in each company. Intercompany transactions in Business Central allow you to transact sales and purchasing documents and general journal entries between companies.
Whether your organization operates with multiple branches in different currencies or multiple legal entities in the same country. Business Central Intercompany Transactions allows you to exchange services and goods between companies while eliminating the need to duplicate transactions.
For example, the sales invoice is created in company A (the Sending Company) and this – via various elements of set up – will create the equivalent purchase invoice in company B (the Receiving Company).
The guiding principle to be followed throughout is that for every element in company A, an equivalent element needs to exist in company B. Think of it like a plug and a socket. A three-pin plug will successfully connect to a three-pin socket but if you have two pin socket it will fail.
Setups
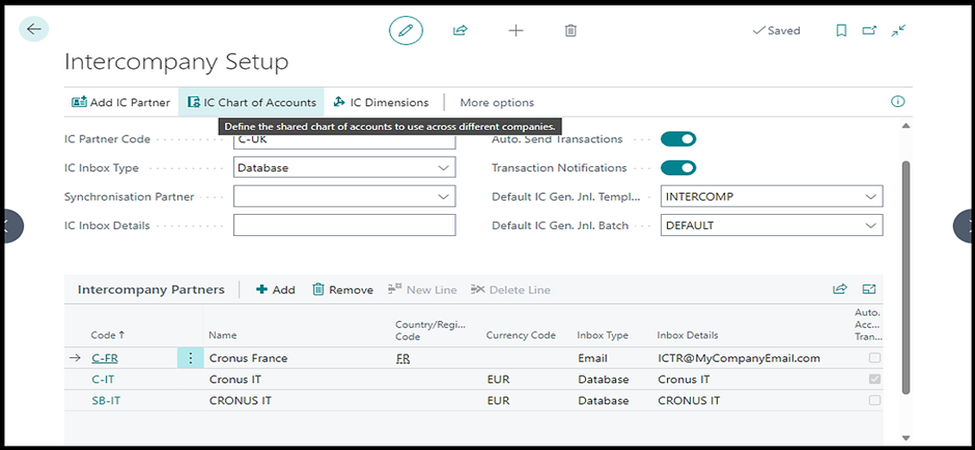
Each company needs to be identified by an Intercompany Partner Code. This will provide controls for the company. In Addition, the companies that will exchange information will be connected under Intercompany Partners.
A partner represents a company in Business Central. An intercompany partner can also be assigned to a customer or vendor, if you intend to purchase and sell products or services between companies using orders or invoices.
Intercompany transacting requires a dedicated setup in all companies that trade with each other. This defines each company to the other including customer, vendor and general receivables and payables.
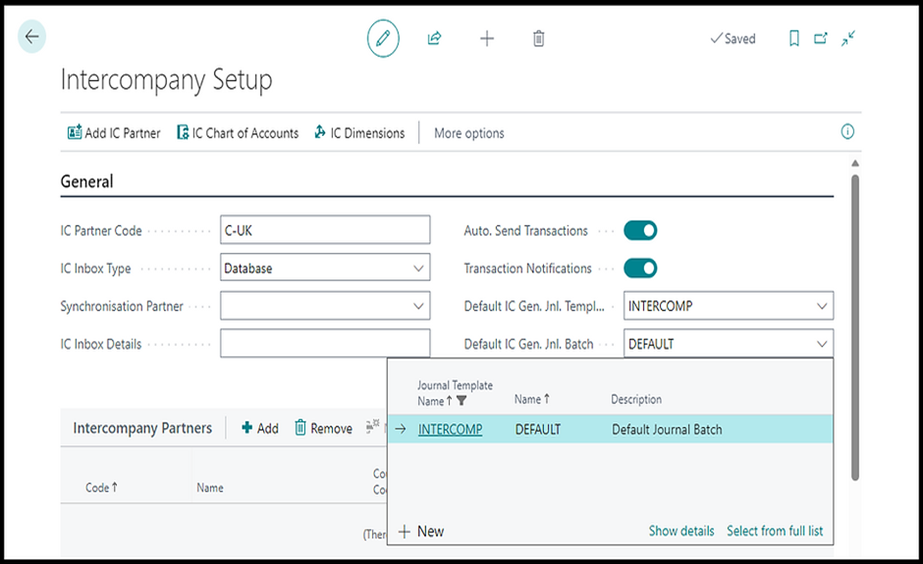
The first step is to create the Intercompany Code for each company. Then utilize those codes as you complete the intercompany partner setups. It is recommended to use codes that help identify the Company and the IC Partner. Examples: (SCJ) for Steve Chinsky’s Jets or (DCL) for Dallefeld Consulting LLC.
Intercompany Partners
- Intercompany partners are set on the Intercompany Setup page. Working on multiple browser tabs when configuring intercompany partners can make it easier to match the IC codes of the different companies.
- Use the action Add IC Partner on the page menu to create an intercompany partner and fill in the relevant fields.
- Use the Company Name field on the IC partner page to link an IC partner to a company in Business Central.
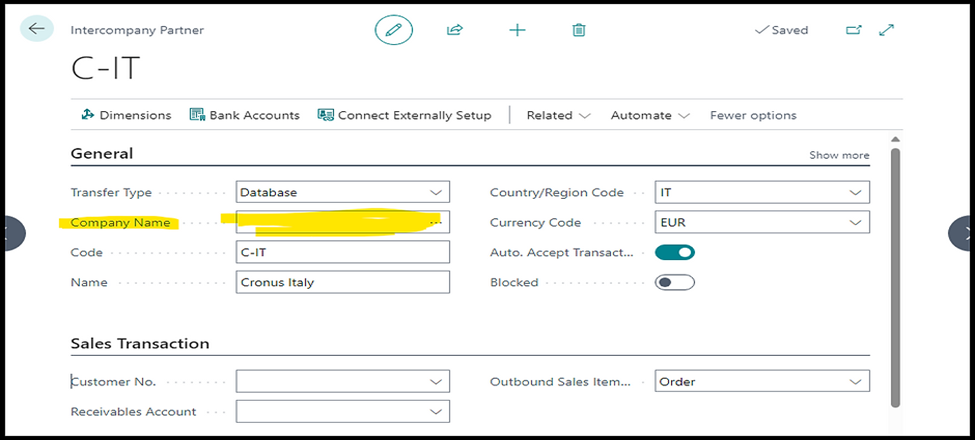
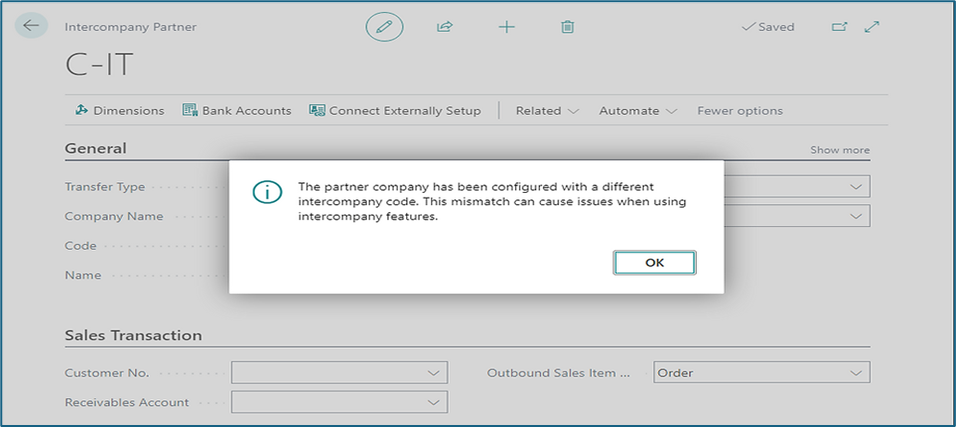
Business Central will validate the IC code in the company linked to this code, which is Cronus Italy in the example. You will get a warning if the value of the Intercompany Code chosen on this page does not match the IC code in the other company. The error below is an example of an incorrect configuration.
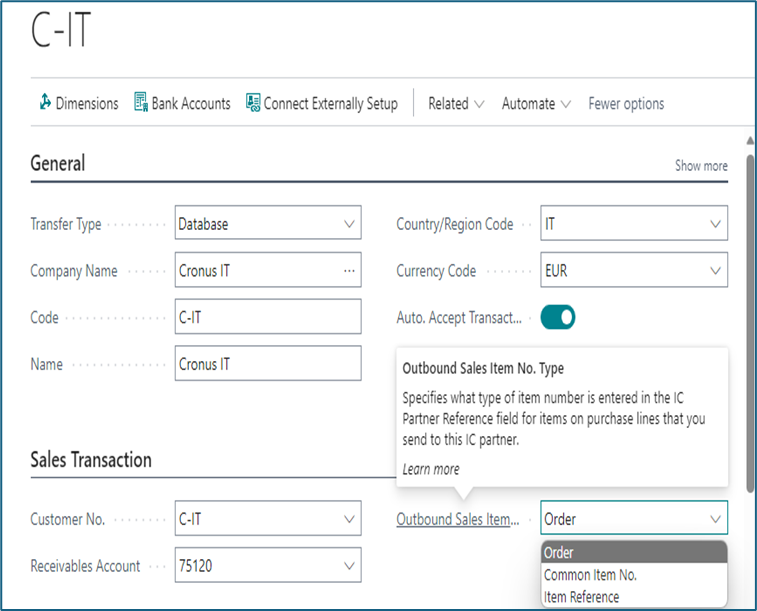
Sales and Purchase Transactions Tabs
The Receivables Account on this page is for defining a dedicated account for intercompany receivables. Whereas the Customer No. can identify a customer record to be used for sales and receivables. The Outbound Sales Item No. Type specifies the item reference used when the intercompany partner receives the order; here, we have three choices:
Order: The item number on the sales document line of the sending company is the same as the item number on the purchase document of the receiving company.
Common Item No. The reference will be the value of the Common Item No. field on the item card.
Item Reference: The item reference code set up for the intercompany customer matches the item reference of the intercompany vendor item reference.
The same logic applies to the purchase transaction tab.
Cross-Environment Intercompany Partners
Starting from Business Central version 23, users can set up intercompany partners and transfer transactions across environments. Business Central allows connecting multiple environments through the Environments page. Each environment comes as an environment link designed to store additional information for system admins. For example, you can create groups to separate production environment from sandbox environment.
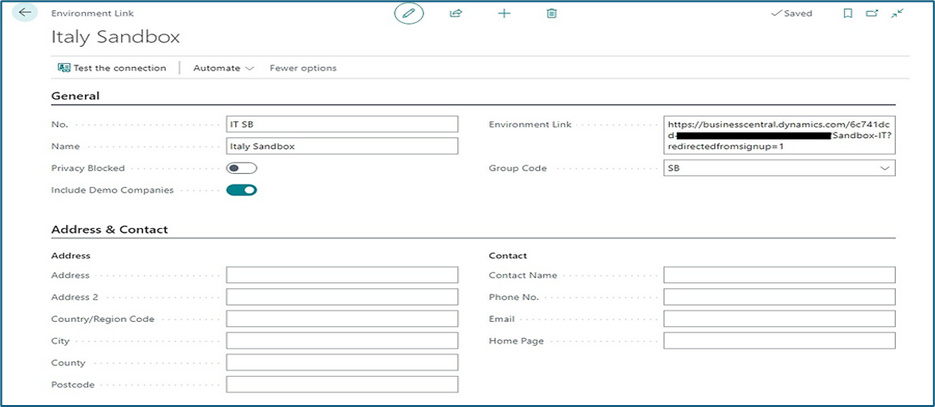
You can add an intercompany partner for a company in the linked environment using a process similar to what has been described before. Use the Connect Externally Setup action this time to link the company hosted in the external environment.
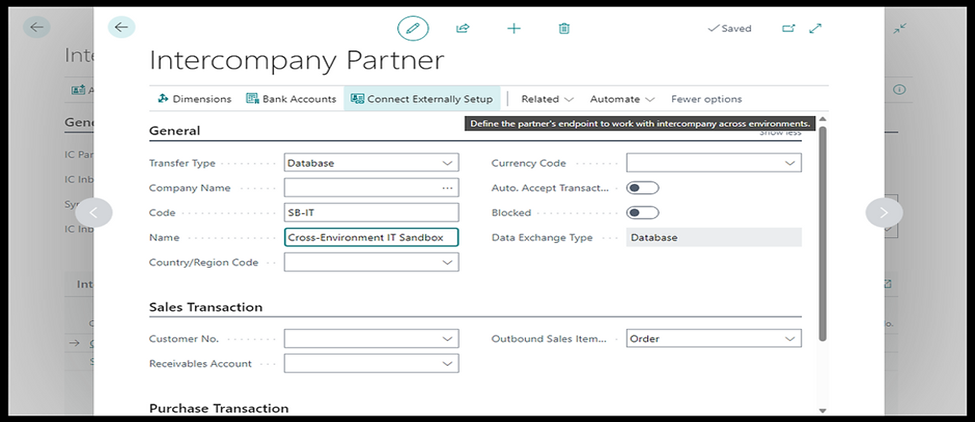
The setup also involves a step where you create and enable a registration application in Azure Portal in the company that you need to give access to from other companies. The picture below shows the Cross Environment IC Setup application with permission to read and write data to Business Central.

Transfer Types
Users can send intercompany transactions using different methods. Which method to use depends on whether you have Business Central on-premises or SaaS.
File Location: Available only for Business Central on-premises. This option allows retrieving Intercompany Transactions as .xml files. In Business Central online, you can’t use file locations to transfer transactions to IC partners because the application can’t access your local network. However, you can still use files to send and receive IC transactions. In this case, the file will be downloaded to the user’s computer, from where it can be sent to someone in the partner company, for example, by email.
Database: This option allows sending transactions within the Business Central database. With the database transfer type, users can exchange intercompany purchases and sales in the sending company and get the corresponding transaction in the receiving company’s inbox.
Email: With email the .xml files are exchanged via email. Users must download the attachment and import it into the IC Inbox.
No Transfer: With this option, there is no transfer of data.
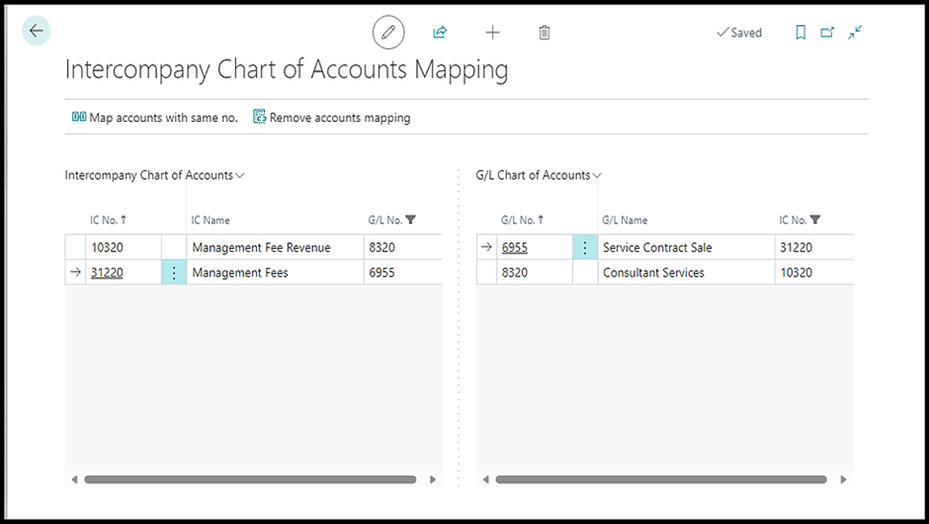
Intercompany Chart of Accounts
Companies set up to exchange sales and purchases require the same intercompany chart of accounts. Note: not the same chart of accounts! The “IC Chart of Accounts’ feature is used to map the accounts of the trading partners so that transactions sent by one company are received to the correct account by the other partner.
There are basically two options for mapping general ledger accounts between the partners
- Map accounts with same no.
Mapping using the same codes of the main company’s COA works if the subsidiaries have a different chart of accounts. For example, you map an expense account of a subsidiary company to a revenue IC general ledger code that is the same revenue account of the parent company.
In other words, there are already intercompany sales and cost of sales accounts.
- Accounts are not the same
You must use a different mapping if the subsidiary has the same chart of accounts of the main company. In that case, a revenue account of the COA must be mapped against an expense account of the IC COA and vice versa.
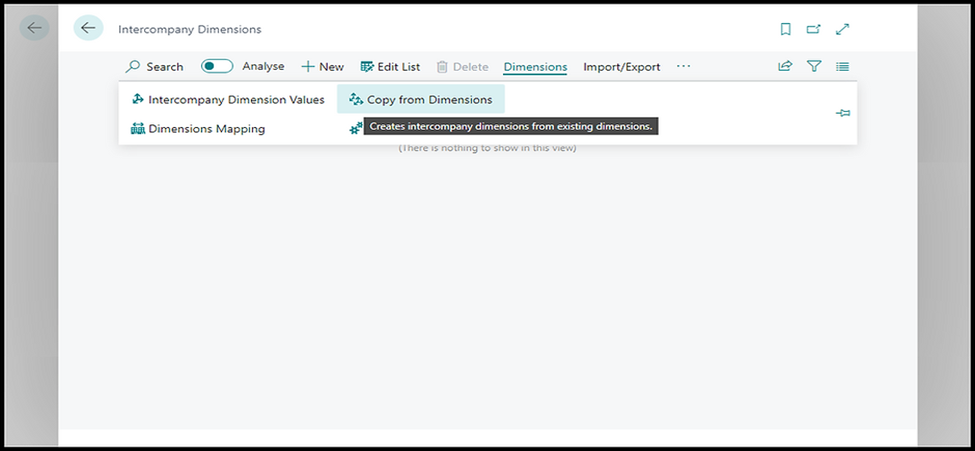
Intercompany Dimensions follows a similar logic to the Intercompany Chart of Accounts and consists of codes and values you can use to map dimensions when sending and receiving transactions between two companies in Business Central. The option to copy and map dimensions is also available, like with the IC chart of accounts.
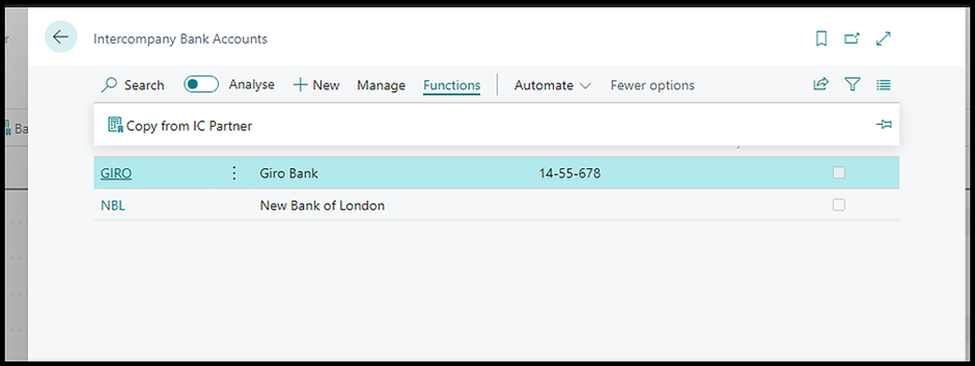
Like the chart of accounts and dimensions, intercompany bank accounts allow the mapping of bank accounts of the trading entities when posting intercompany payments. The IC bank accounts can be copied from the IC partner if the exchange type is Database.
Intercompany Transactions
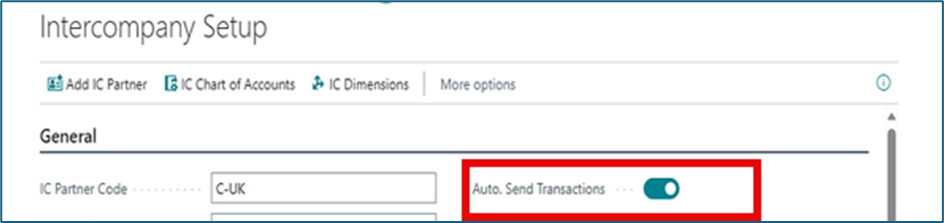
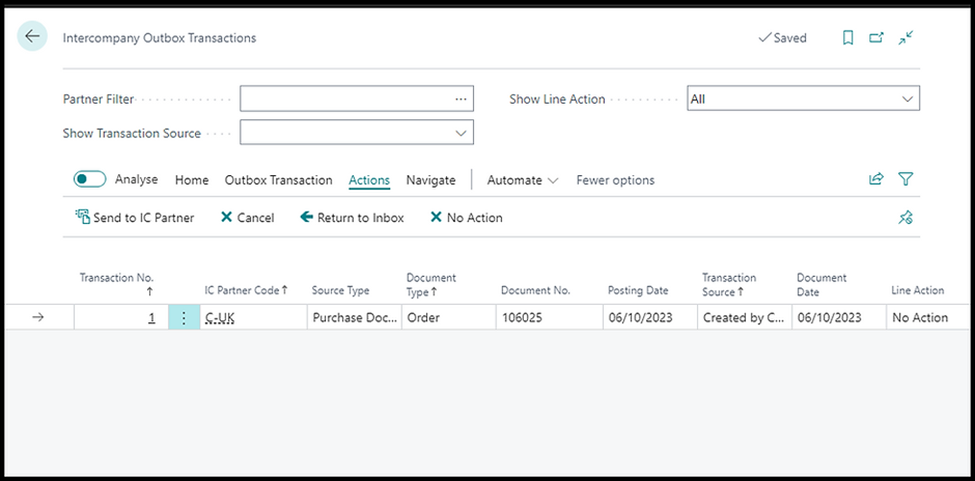
Transactions between companies are handled much like email boxes. The sending company has a Intercompany Outbox and once processed or sent the transactions move to a Handled Intercompany Outbox. This allows users to manually send transactions. To automate the sending of the transactions, the intercompany Setup provides the Auto Send Transactions.
Sales and Purchases
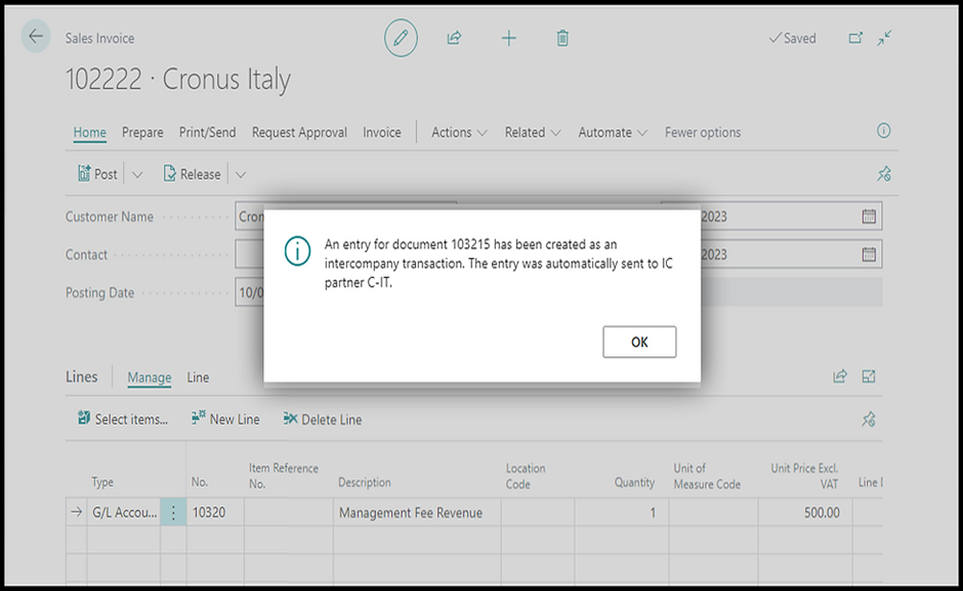
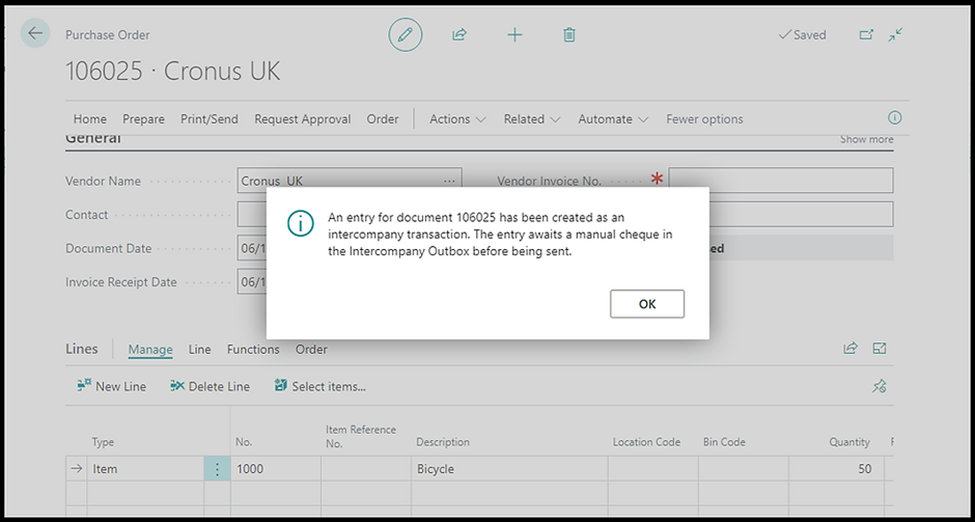
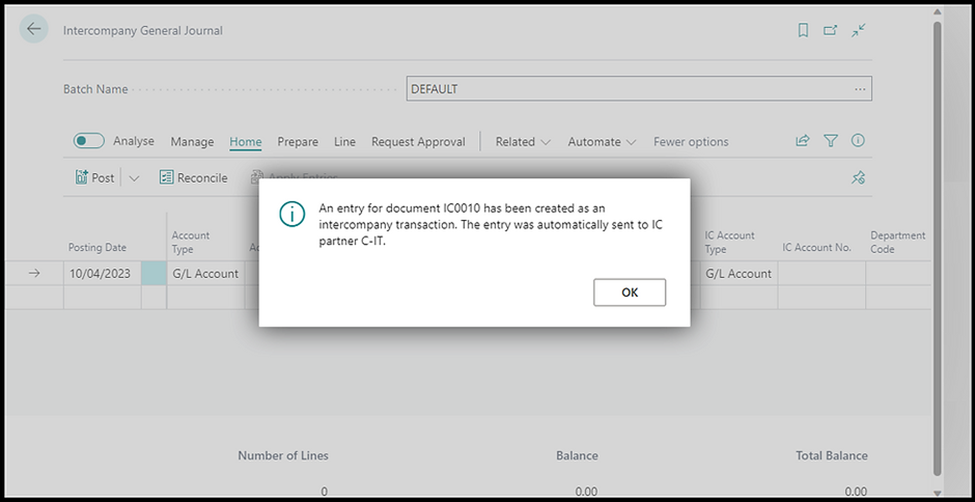
Business Central sends the intercompany transaction automatically when you post an invoice for an intercompany partner. The example below shows the confirmation message I received after posting a sales invoice for customer C-IT.
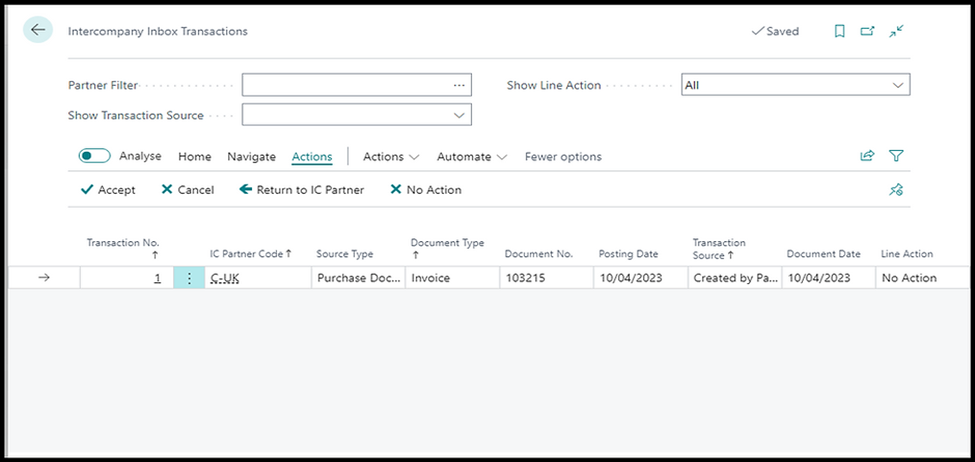
The corresponding transaction in the receiving company will appear in the Intercompany inbox. Alternatively, you can set up to auto-accept inbound transactions. In my example, auto-accept is off. Therefore, I must open the Intercompany Inbox to find the purchase document.
You can open the document and see all the details in the IC inbox before accepting, including the document lines and the dimensions. You can also cancel or return the transaction to the sender.
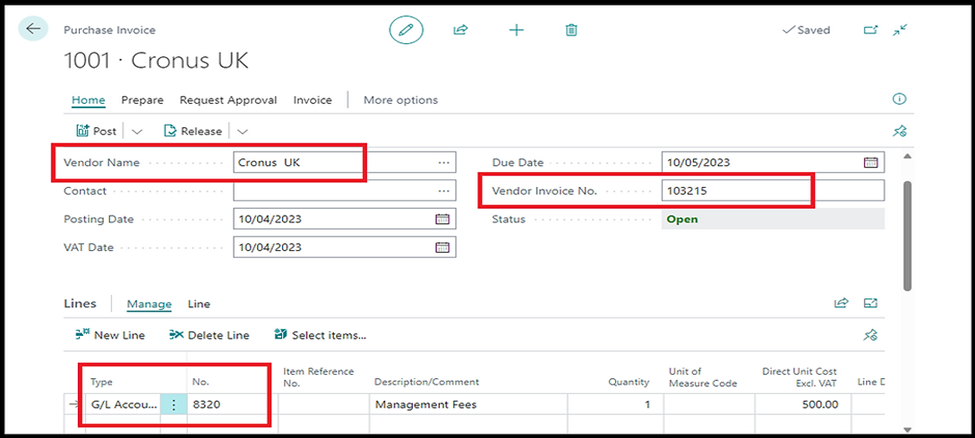
After accepting the IC transaction, Business Central created the purchase invoice. The picture below shows the document created.
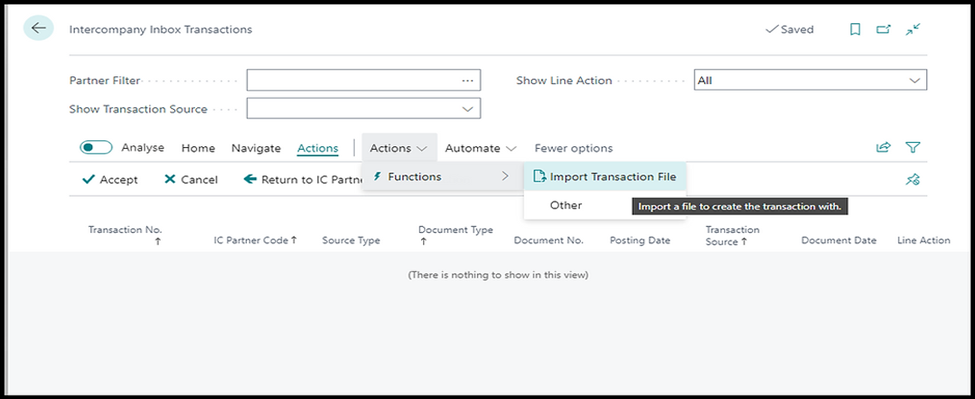
You can also use the IC inbox to upload files when the transfer type is not Database. As I explained before, Business Central allows the exchange of Intercompany Transactions as files via email or a shared folder.
Orders
You can send orders as IC transactions to Business Central; this process requires the additional step of sending the transaction using the dedicated action on the document menu.

NOTE: You must disable auto-send IC transactions when working with intercompany orders because Business Central will always create a new IC transaction when you post an invoice from the order. Consequently, you will end up with an order and an invoice for the same document.
Intercompany General Journals
You can use journals to post intercompany transactions in Business Central by using Intercompany General Journal. This journal type is an extended general journal that includes additional fields. Below is an example:
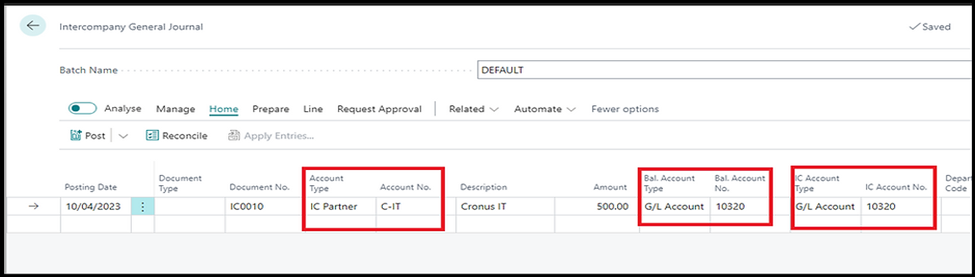
The account type of the journal above is an IC partner so I could select partner C-IT in the next field. I chose the Management Fees Revenue as the Balancing Account No. and the IC Account No was added automatically because it’s linked to account 10320 via the Intercompany Chart of Accounts.
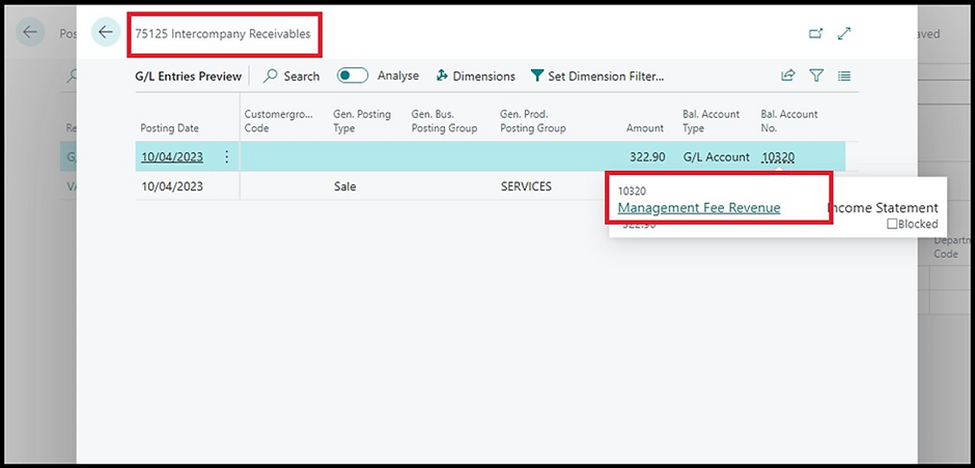
Posting the journal credited Management Fees and debited Intercompany Receivables.
By posting this journal, Business Central created an IC transaction.
Receiving Company
It is always up to the Receiving Company to process their transactions.
Shipping and invoicing sales orders
Receiving and invoicing purchase orders
Posting intercompany general journals
Auto Send will do the data entry, but manual intervention is still required to review, approve and post.
There are several setups, but they are fairly straightforward and once setup, maintenance is minimal. Even adding another company is quick. The REAL gain is the reduction of duplicated efforts. Enter one time and data flows between the companies. And you have two complete companies.
Now go check out Consolidations!!