
Super Excited….I’m such a proud nerd and geek!
For a long time, in Business Central we wanted to have Vendor Remit to Addresses. And thank you Microsoft, for adding this feature to Business Central a few versions back. Initially, the issue was that it was designed such that the data entry clerk had to indicate, on the Purchase document, the Remit-to Address for each invoice and credit memo.
To be honest, because of this, I never recommended the use of the Remit-to Address feature. It just seemed too easy to miss and it was unchangeable. So for users, it was not the best solution. I was recommending to my clients to use the Pay-to Vendor which required two vendor records and not the desired situation either.
I have to admit that I only learned yesterday (November 5, 2024) that the Remit-to Address record has a field entitled ‘use as default address’. When checked, and only one remit-to address can be the default, the remit-to address code is automatically applied to all new purchase documents. Payment journal execution of payments then utilizes this remit-to address and can be seen on printed checks.
Let’s take a look at the setup and process….
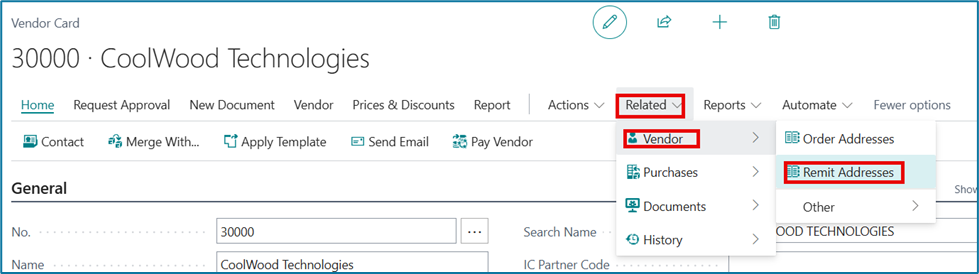
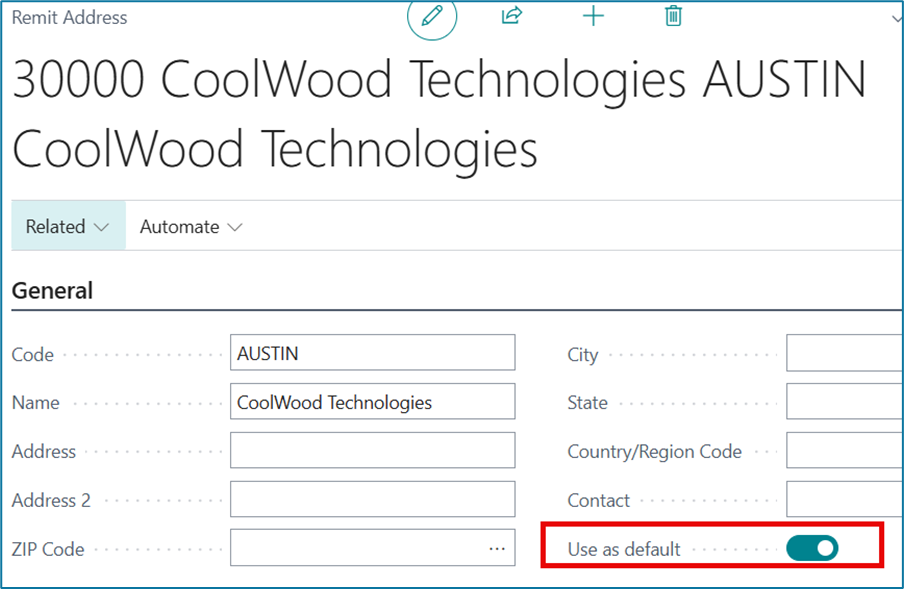
- A vendor Remit-to addresses must be setup. From the Vendor Card, go to Related >> Vendor >> Remit Addresses.
2. Select new and assign a code; this can be the city name, a sequential number, really anything as it’s a placeholder.
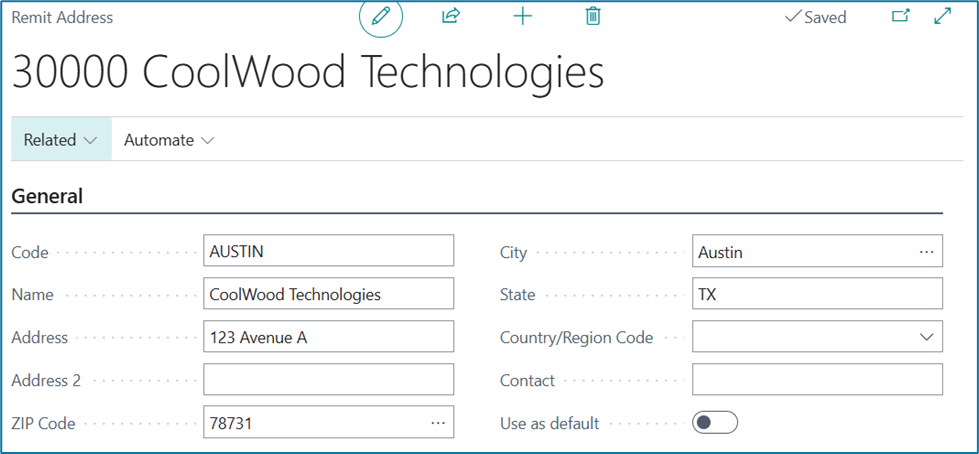
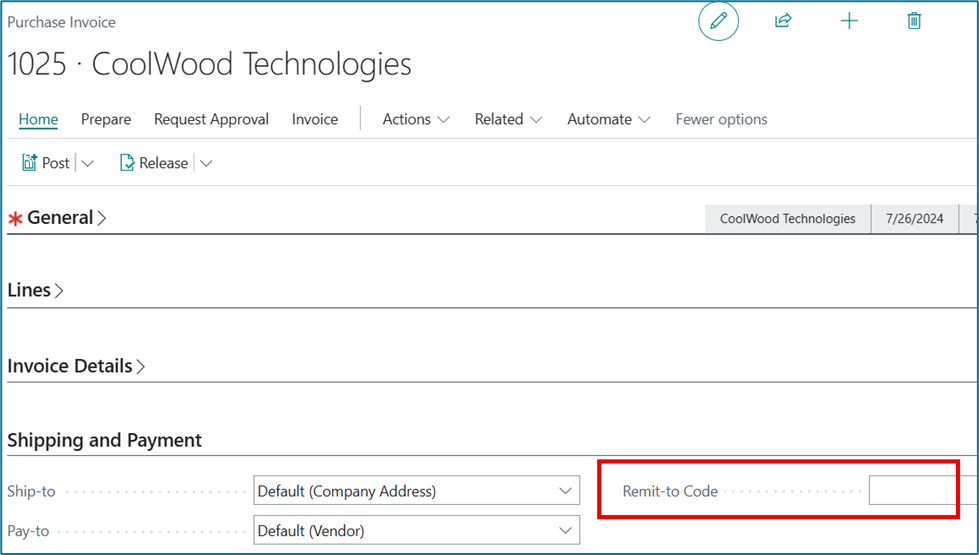
3. The important field is ‘use as default’. When selected, purchase documents will automatically inherit the remit-to code. If you do not select the remit address as the default, the purchase invoice will have no remit-to code populated. Here’s an example:
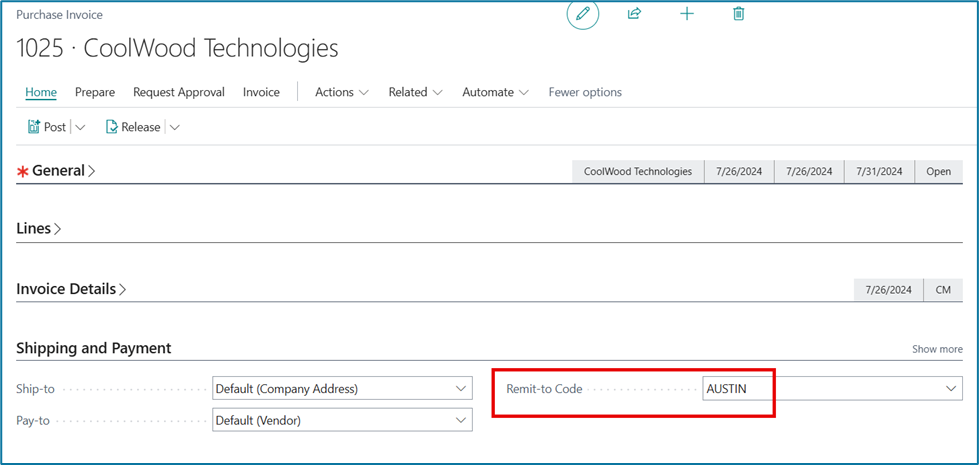
4. When you do set the ‘use as default’ on the Remit-to address record.
The purchase invoice will have a remit-to code automatically.
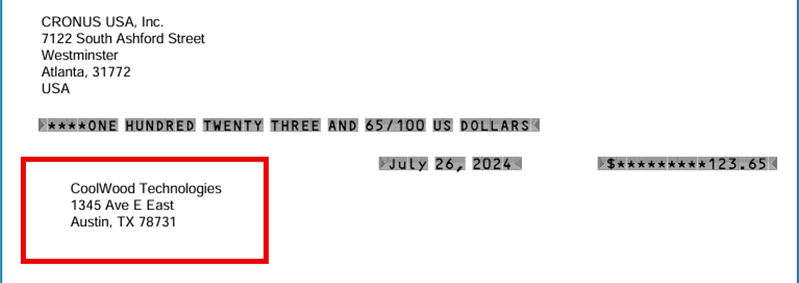
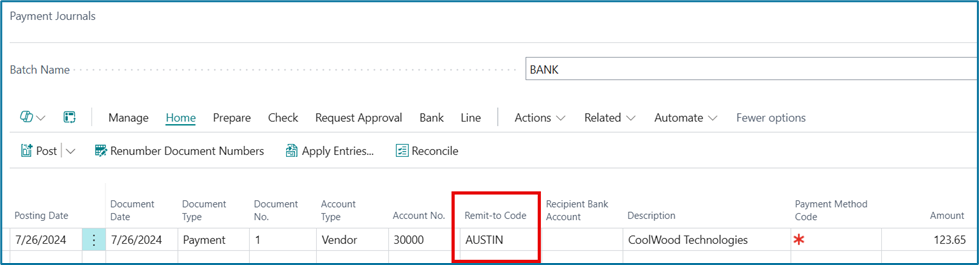
5. Then when you go to pay the invoice in the payment journal, the remit-to code follows into the payment journal line. The Remit-to data will be what prints on the check.
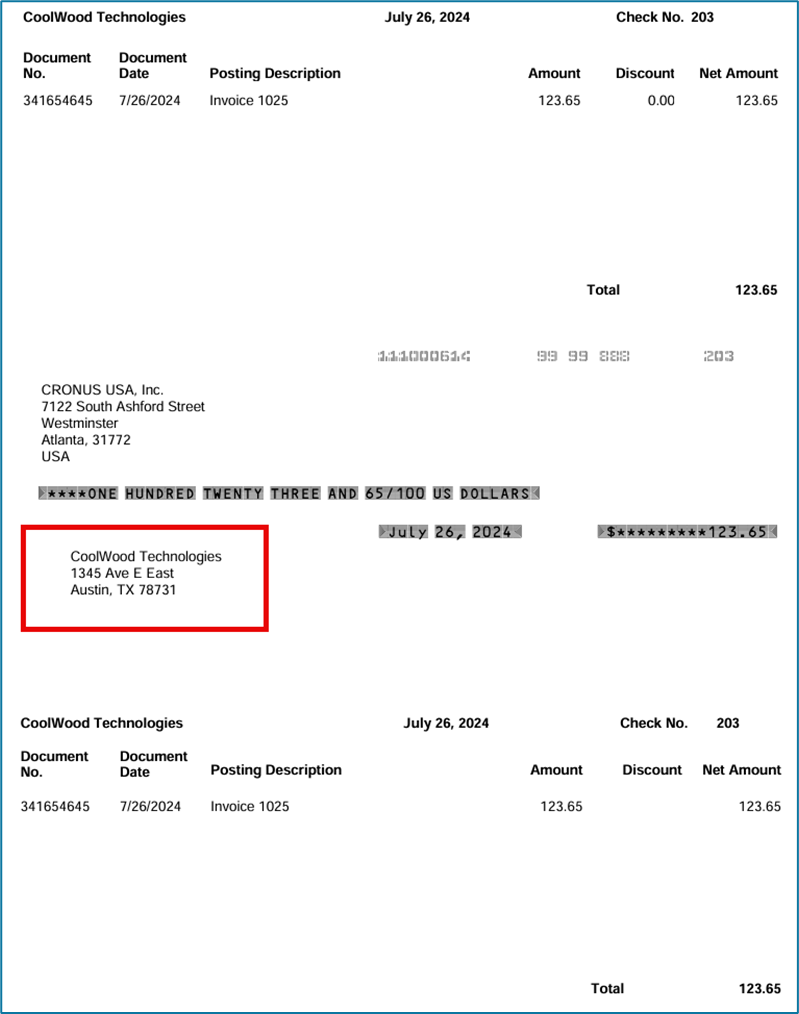
6. Example using Stub/Check/Stub format
Don’t forget you still have the option to override the Remit-to on any purchase document. So for that troublesome vendor that has different remit-to addresses, your data entry process must change but then you can accommodate the vendor with checks going to different addresses.
Good Luck and Happy Remitting!